
Cricfy TV via BlueStacks — Dedicated Emulator Setup
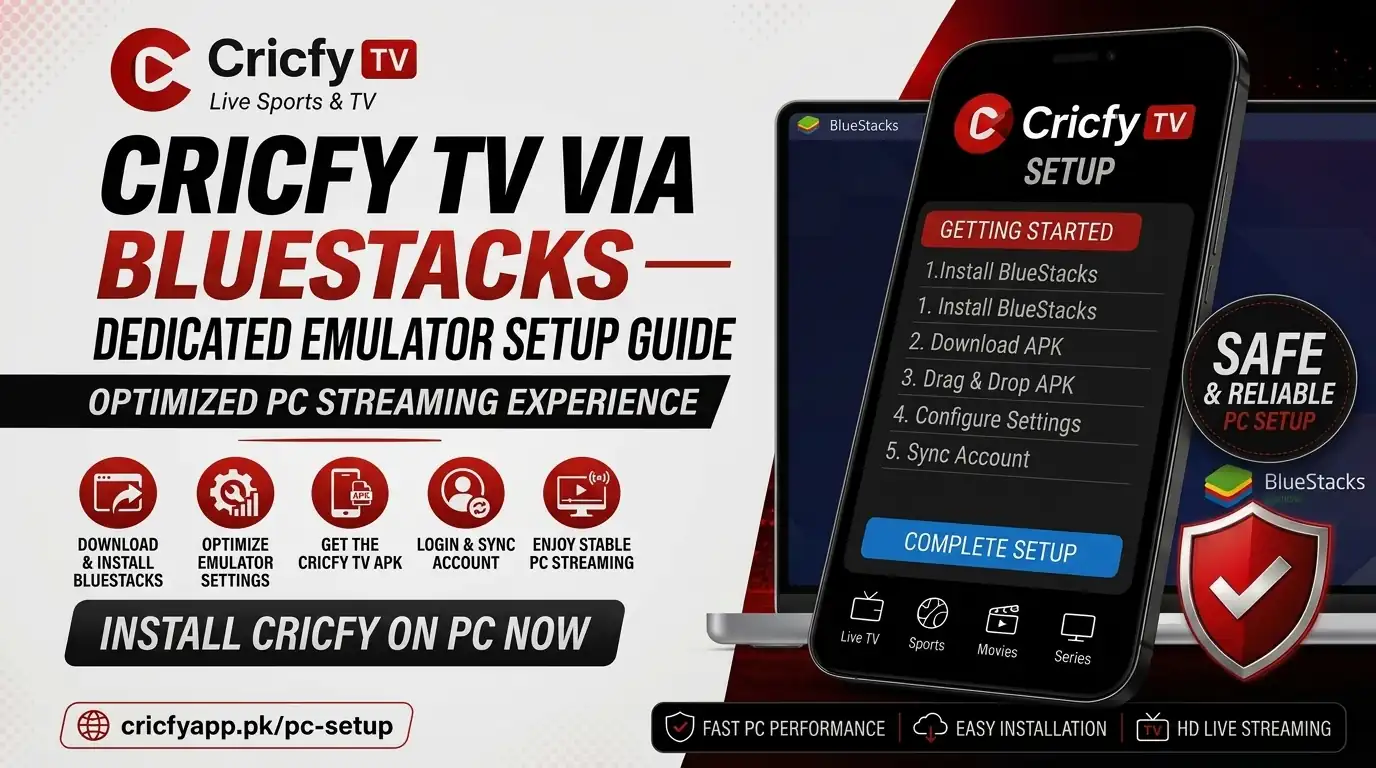
Running Cricfy TV on a big desktop screen is a game-changer — and cricfy tv on BlueStacks is the cleanest, most reliable way to make it happen. This guide walks you through every single step: downloading BlueStacks, sideloading the Cricfy TV APK, tuning performance for crystal-clear HD streams, and fixing anything that goes wrong. No guesswork. No fluff. Just the exact setup that works.
Why BlueStacks Is the Best Way to Run Cricfy TV on PC
Let’s be honest — watching cricket on a tiny phone screen while sitting at your desk just does not feel right. You want a proper full-screen experience, stable performance, and the ability to multitask at the same time.
That is exactly what BlueStacks gives you. It is an Android emulator that creates a full virtual Android environment inside Windows. Think of it as your phone’s operating system running right inside your PC.
Here is why BlueStacks is the go-to choice for Cricfy live TV streaming on PC:
- Full-screen HD streaming — no more squinting at a 6-inch screen.
- Multi-instance support — open two BlueStacks windows and watch two matches side by side.
- Stable performance — BlueStacks is optimized for smooth playback, not heavy mobile gaming.
- Free to download and use — no subscriptions, no hidden charges.
- Works on most Windows PCs — even mid-range machines handle it just fine.
BlueStacks is already trusted by over 500 million users worldwide. It is not some random tool — it is the most downloaded Android emulator on the planet. If you prefer a native Windows experience without an emulator, check our dedicated guide on Cricfy TV for Windows 11.
PC Requirements Before You Start
Before you download anything, confirm your PC can handle BlueStacks properly. Running it on a machine below the minimum specs will only lead to stuttering streams and frustration.
| Spec | Minimum | Recommended |
|---|---|---|
| OS | Windows 7 and above | Windows 10 / 11 |
| Processor | Any Intel or AMD CPU | Multi-core, PassMark > 1000 |
| RAM | 4 GB | 8 GB or more |
| Storage | 5 GB free (HDD) | SSD or Hybrid Drive |
| GPU | Integrated graphics | Dedicated GPU, PassMark ≥ 750 |
| Internet | Any broadband | 10 Mbps+ for HD streams |
| Virtualization | Helpful but not required | Must be enabled in BIOS |
The most important thing here is virtualization. It is what allows BlueStacks to run Android apps at near-native speed on your PC. Without it, you will get choppy playback. We cover exactly how to enable it in the next section.
How to Enable Virtualization on Your PC
Virtualization is a processor feature — both Intel (called Intel VT-x) and AMD (called AMD-V) support it. It is usually disabled by default in your system’s BIOS or UEFI firmware. Turning it on takes about 2 minutes.
Step-by-Step: Enable Virtualization in BIOS
- Restart your PC. As it boots up, press the BIOS key — this is usually Del, F2, F10, or F12, depending on your motherboard manufacturer.
- Find the CPU or Advanced settings tab. Look for an option called “Intel Virtualization Technology,” “Intel VT-x,” or “SVM Mode” (for AMD chips). The label varies by BIOS version.
- Set the option to “Enabled.” Use your arrow keys or mouse to toggle it on.
- Save and exit. Press F10 to save your changes, then confirm and let the PC restart normally.
On modern Windows machines, you can also restart directly into UEFI settings. Go to Settings > Recovery > Advanced Startup > Restart now, then choose Troubleshoot > Advanced Options > UEFI Firmware Settings.
Once your PC restarts, virtualization is active. BlueStacks will detect this automatically and switch to hardware-accelerated mode, which makes the biggest difference in streaming performance.
Download and Install BlueStacks 5
Always get BlueStacks from the official website. Never download it from a third-party source — the official installer is clean, lightweight, and malware-free.
- Open your browser and go to bluestacks.com. Click the green “Download BlueStacks 5” button on the homepage.
- Run the downloaded installer file (
BlueStacksInstaller.exe). Click “Install Now” when the setup window appears. - BlueStacks will download its core files in the background. This usually takes 3 to 8 minutes depending on your internet speed.
- Once installation finishes, BlueStacks opens automatically to its home screen. You will see an Android-style launcher interface — that means everything worked correctly.
Use BlueStacks 5 if your PC meets the recommended specs. If you are on a lower-end machine with limited RAM, BlueStacks 10 is worth trying — it is cloud-assisted and requires fewer local resources. For streaming purposes like Cricfy TV, BlueStacks 5 gives you better control over resolution and playback quality.
Skip the Google Play Login (Optional)
BlueStacks will ask you to sign in with a Google account. You can use this route to download Cricfy TV from the Play Store if it is available there. However, the most reliable and updated method is to sideload the Cricfy TV APK directly. We recommend using a secondary Google account for privacy.
Get the Cricfy TV APK
Since Cricfy TV is not always available through the standard Play Store listing, downloading the APK directly from the official source is the cleanest option.
- Go to the Cricfy TV official website on your PC browser.
- Look for the APK download button or the latest version release page. Always download the most recent version for the best streaming quality and bug fixes.
- Save the APK file somewhere easy to find — your Desktop or Downloads folder works perfectly.
Only download the Cricfy TV APK from cricfyapp.pk — the official source. Avoid random APK hosting sites. They often bundle outdated versions, and some may contain unwanted software.
Want to see what each version brings? Check the full Cricfy TV v6.8 APK release notes or browse all previous releases on our APK archive pages for version history.
Install Cricfy TV in BlueStacks — Two Methods
There are two ways to get Cricfy TV running inside BlueStacks. Method A is the fastest — just drag and drop the APK. Method B is the manual route through the BlueStacks interface.
Method A — Drag and Drop (Fastest)
- Make sure BlueStacks is open and running on your PC.
- Open the folder where you saved the Cricfy TV APK file.
- Drag the APK file and drop it directly onto the BlueStacks window.
- BlueStacks will automatically detect the APK and start the installation. You will see a progress bar at the bottom of the screen.
- Once installation completes, the Cricfy TV icon appears in the BlueStacks home screen app drawer. Tap it to open.
Method B — Install APK Button
- In BlueStacks, look at the right-side toolbar and click the folder icon labeled “Install APK.”
- A file browser opens. Navigate to where you saved the Cricfy TV APK and select it.
- BlueStacks installs the app instantly. Find it in the My Apps tab or on the home screen.
Both methods work identically. The drag-and-drop method is simply faster. If BlueStacks shows an error during install, check that you have the correct APK architecture — most modern PCs need the ARM-compatible version, which the official Cricfy TV APK already provides.
First Launch and Setting Up Cricfy TV
You have installed the app. Now let’s get it running properly so you can start watching live cricket, PTV Sports, ARY Sports, or any other channel from the Cricfy TV channel list.
- Click the Cricfy TV icon in the BlueStacks home screen. The app loads just like it does on a phone.
- On the home screen, browse the live channels or scroll through the channel list. You can check the full Cricfy TV live channel list to know exactly what is available.
- Select any channel to start streaming. The player loads within a few seconds on a solid internet connection.
- Use the BlueStacks fullscreen button (or press F11) to go full screen. Your cricket match now fills your entire monitor.
- Use your mouse to navigate the app’s touch interface — BlueStacks maps mouse clicks to screen taps seamlessly.
Press Ctrl + Shift + H to go back to the BlueStacks home screen from inside the app. It works just like the Android back button.
BlueStacks Performance Settings for Smooth HD Streaming
Out of the box, BlueStacks works well. But with a few targeted tweaks, you can unlock noticeably smoother live streams and reduce buffering significantly. Here is exactly what to adjust.
Allocate More CPU and RAM
Go to BlueStacks Settings > Performance. You will see sliders for CPU cores and RAM allocation. Set these values:
| Setting | Default | Recommended for Cricfy TV |
|---|---|---|
| CPU Cores | 1 core | 2 to 4 cores |
| RAM Allocation | 1 GB | 3 – 4 GB |
| Performance Mode | Balanced | High Performance |
| Frame Rate | 60 FPS | 60 FPS (keep at 60) |
| Graphics Engine | Auto | Performance |
After saving these settings, restart BlueStacks. The difference is usually immediately noticeable — especially in channel loading speed and stream stability.
Set BlueStacks Priority in Task Manager
Windows sometimes throttles background processes, including BlueStacks. Manually raising its priority fixes this:
- Right-click the Windows taskbar and open Task Manager.
- Go to the Details tab and find
HD-Player.exeorBlueStacks.exe. - Right-click the process, choose Set Priority, then select Above Normal.
- Confirm the change. Task Manager now gives BlueStacks more processor time — which directly improves stream smoothness.
Enable Hardware Decoding
Inside the Cricfy TV app itself, go to its player settings and look for “Hardware Decoder” or “Hardware Acceleration.” Switch it on. This offloads video decoding to your GPU instead of the CPU, which results in smoother high-definition playback and lower heat output.
Close Background Apps
Live streaming is network-intensive. Close Chrome tabs, pause any downloads, and shut down background apps before you start watching. Even a browser with a few tabs can eat 200 to 400 MB of RAM — resources BlueStacks could use for a better stream.
For stable HD live cricket streaming, aim for at least a 10 Mbps connection. If you are on Wi-Fi and experiencing drops, switch to a wired Ethernet connection. The stability difference is significant during high-stakes live matches.
What Channels Can You Watch on Cricfy TV via BlueStacks?
One of the biggest reasons people use Cricfy live TV is the sheer breadth of channels available. Once you have the app running through BlueStacks on your PC, you get access to the same complete channel lineup as the mobile app — displayed on your full desktop screen.
| Category | Channels Included |
|---|---|
| Cricket & Sports | PTV Sports, ARY Sports, Ten Sports, Star Sports, Willow TV, Sky Sports Cricket |
| News | Geo News, ARY News, Dawn News, Samaa TV, 92 News |
| Entertainment | Hum TV, ARY Digital, Geo Entertainment, Express Entertainment |
| International Sports | ESPN, beIN Sports, SuperSport, Sony Six, Sony Ten |
| Kids | Cartoon Network, Nickelodeon, Disney Channel |
| Movies | Hum Sitaray, ARY Zindagi, various movie channels |
For the most up-to-date list with all regional and international channels, visit the complete Cricfy TV channel list. The lineup does get updated regularly as new channels are added.
Live cricket coverage spans ICC events, ICC tournaments, PSL matches, home series organized by the Pakistan Cricket Board (PCB), and bilateral international series. So whether it is a Test match at Karachi’s National Stadium or a T20 World Cup final, Cricfy TV has you covered.
Troubleshooting Common Issues with Cricfy TV on BlueStacks
Even with a clean setup, things can go sideways sometimes. Here are the most common problems people run into — and exactly how to fix them.
BlueStacks Won’t Install or Open
- Make sure virtualization is enabled in BIOS (see Section 3).
- Temporarily disable your antivirus during installation — some AV programs block emulators incorrectly. Re-enable it after BlueStacks is running.
- If you use BitDefender, note that it is known to conflict with BlueStacks. Add BlueStacks as an exception in BitDefender’s settings.
- Run the installer as Administrator by right-clicking it and selecting “Run as administrator.”
Cricfy TV APK Won’t Install in BlueStacks
- Confirm the APK file downloaded fully — a partial download corrupts the install.
- Try the alternative install method (drag-and-drop vs. the Install APK button).
- Restart BlueStacks and attempt the install again.
- Make sure you are running BlueStacks 5 — older versions may not support newer APK builds.
Video Buffering or Choppy Stream
- Increase RAM and CPU allocation in BlueStacks Settings > Performance.
- Enable Hardware Decoding inside the Cricfy TV player settings.
- Raise BlueStacks process priority in Task Manager (Above Normal).
- Switch from Wi-Fi to a wired Ethernet connection.
- Close all other browser tabs and background applications.
- Try switching to a lower quality stream (720p instead of 1080p) if your connection is the bottleneck.
If Cricfy TV shows an “Unexpected Error Occurred” message, the fix is usually simple. See our dedicated Cricfy TV Unexpected Error fix guide for all solutions in one place.
App Loads But No Channels Play
- Check your internet connection first — open a browser inside BlueStacks and see if websites load.
- Clear the Cricfy TV app cache: go to BlueStacks > Android Settings > Apps > Cricfy TV > Clear Cache.
- Make sure you have the latest Cricfy TV APK installed. Older versions can lose server compatibility.
- Some ISPs in Pakistan restrict certain streaming apps. If this is the case, a VPN connection usually resolves it immediately.
BlueStacks Is Running Slowly
- Switch to Performance mode in BlueStacks settings.
- Make sure you have at least 8 GB of system RAM for comfortable multitasking alongside BlueStacks.
- Update your graphics drivers from the GPU manufacturer’s website (not just Windows Update).
- Reboot your PC if BlueStacks has been running for several hours — memory can accumulate over extended sessions.
For general Cricfy TV app problems not specific to BlueStacks, our Cricfy TV not working guide covers every common scenario with step-by-step fixes.
Frequently Asked Questions
Is BlueStacks safe to use for streaming Cricfy TV?
Yes. BlueStacks is one of the most widely used Android emulators in the world, trusted by over 500 million users. It does not carry malware, spyware, or any harmful software. Always download it from the official bluestacks.com website to stay safe.
Can I watch live cricket on BlueStacks in full HD?
Yes. When you run Cricfy TV via BlueStacks and enable hardware decoding, the app streams at up to 1080p HD. The actual quality you receive depends on your internet speed and the stream source quality for a given channel.
Does Cricfy TV work on Mac with BlueStacks?
BlueStacks supports macOS 11 (Big Sur) and above. So yes, you can run Cricfy TV via BlueStacks on a Mac too. The setup process is identical — download BlueStacks for macOS from the official site, then sideload the Cricfy TV APK.
What is the difference between Cricfy TV on BlueStacks vs. the Windows app?
The BlueStacks method runs the actual Android version of Cricfy TV inside an emulator environment. A native Windows app, if available, runs directly on Windows without emulation. The emulator route gives you the full Android Cricfy TV experience — including all the same channels and features. See our guide on Cricfy TV for Windows 11 for the comparison.
Can I watch two cricket matches at the same time on BlueStacks?
Yes. BlueStacks supports Multi-Instance mode. You can open two separate BlueStacks windows simultaneously, run Cricfy TV in both, and have two different matches or channels playing side by side on your monitor.
How do I update Cricfy TV inside BlueStacks?
Download the latest Cricfy TV APK from cricfyapp.pk and install it through the same drag-and-drop or Install APK method. BlueStacks automatically overwrites the older version and keeps your settings intact. You do not need to uninstall the old version first.
Cricfy TV is buffering on BlueStacks. What do I do?
Allocate more CPU cores and RAM to BlueStacks in its performance settings, enable hardware decoding in the Cricfy TV player, raise BlueStacks process priority to “Above Normal” in Task Manager, and switch to a wired internet connection. If the problem persists, check our full Cricfy TV not working troubleshooting guide.
Is there a better alternative to BlueStacks for running Cricfy TV on PC?
LDPlayer is the main alternative — it is also free and generally performs well for streaming apps. However, BlueStacks 5 is the more stable and widely supported option, especially for media streaming rather than gaming. You could also explore Cricfy TV on laptop options for different use cases.
Final Verdict: The BlueStacks Setup Is Worth It
If you want to watch Cricfy live TV on a proper large screen without buying additional hardware, BlueStacks is the single best option available right now. The setup takes under 15 minutes, the performance is genuinely solid once you apply the right settings, and you get the complete Cricfy TV experience on your desktop.
Enable virtualization, allocate enough RAM and CPU cores, download the APK from the official source, and you are done. Match day on a 27-inch monitor hits different.
For other device setups, explore how to run Cricfy TV on a Smart TV, Amazon FireStick, Android TV / Google TV, or even LG WebOS TV.
Sources & References
- BlueStacks 5 Official System Requirements — BlueStacks Support
- Cricfy Live TV on PC — BlueStacks Official Page
- BlueStacks — Wikipedia
- Android (operating system) — Wikipedia
- International Cricket Council (ICC) — Official Site
- Pakistan Cricket Board (PCB) — Official Site
- Cricfy Live TV — Official Homepage
- Cricfy TV Complete Channel List
3 Comments