
Cricfy TV for PC — Install with BlueStacks (Step-by-Step)
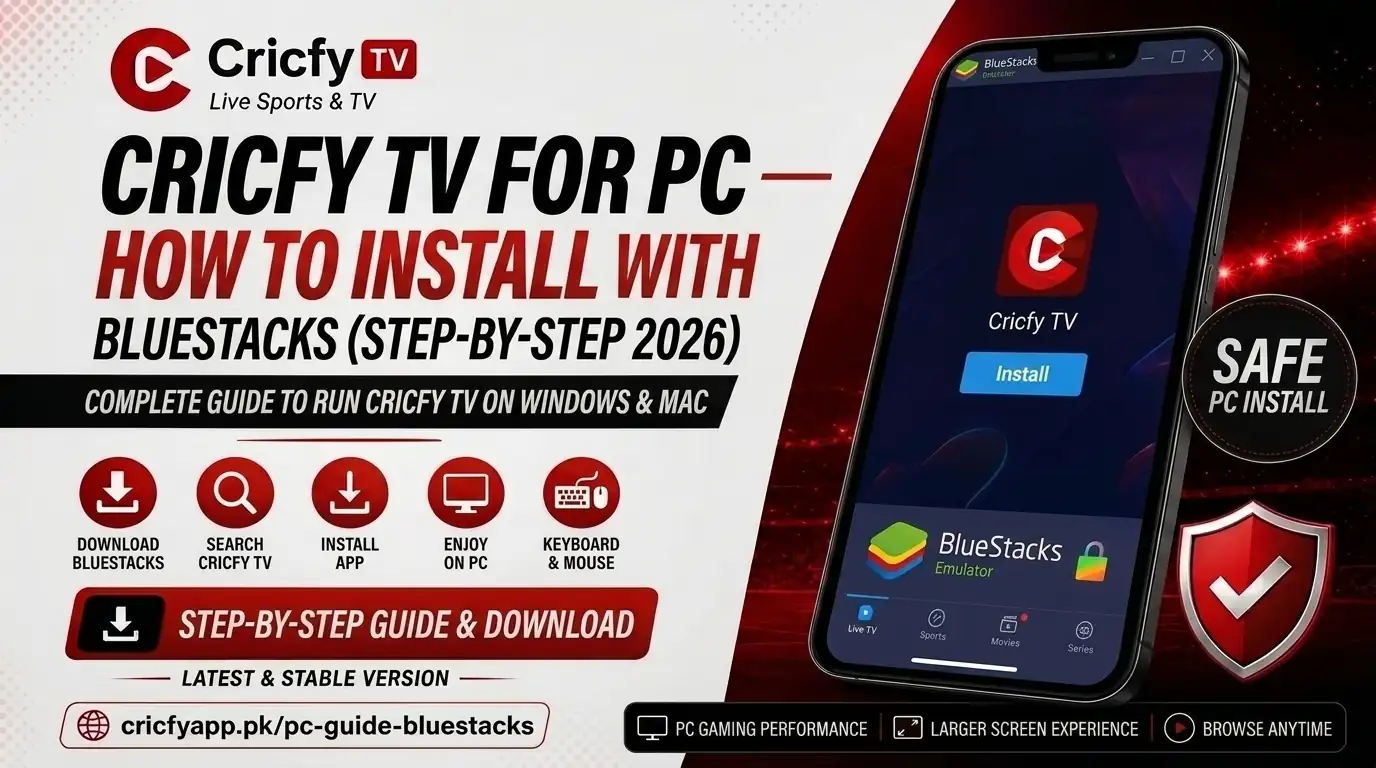
You found a cricket match you have been waiting weeks for. You fire up Cricfy TV on your phone — but the screen is six inches wide, the battery is at thirty percent, and your wife keeps sending messages. Sound familiar? Here is the fix: run Cricfy TV on your PC using BlueStacks. Full HD, big screen, no battery anxiety — and it takes less than ten minutes to set up.
Why Watch Cricfy Live TV on a PC at All?
Your phone works fine for a T20 highlights reel. But for a full Test day, a PSL final, or a Champions Trophy clash, a big monitor changes everything. Here is what you actually gain by moving to a PC:
- Real big-screen viewing. A 24-inch monitor gives you roughly sixteen times the viewing area of a 6-inch phone display. Every boundary, LBW review, and goal-line moment is crystal clear.
- Battery is off the table. Your phone stays charged. No mid-innings panic. No power bank required.
- Proper audio. Desktop speakers or a headset handle stadium atmosphere and commentary far better than a phone speaker pressed at an angle.
- Multitasking. Keep the Cricfy TV stream on one half the screen and live ball-by-ball scores or a channel list on the other. You lose nothing.
- Group viewing at home. Connect the PC to a large LED over HDMI and everyone watches together — no Firestick needed.
In short, switching to PC turns a quick stream into a proper match-day experience. And because Cricfy TV is free, you spend exactly zero extra rupees for the upgrade.
What You Need Before You Start
Good news: the requirements are modest. Most laptops and desktops from 2016 onwards handle this setup without breaking a sweat.
Minimum Requirements (720p Streaming)
| Component | Minimum Spec | Why It Matters |
|---|---|---|
| Operating System | Windows 7 SP1 or later | BlueStacks 5 supports Windows 7 and above |
| Processor | Intel Core 2 Duo / AMD equivalent | Emulation needs at least two logical cores |
| RAM | 4 GB | BlueStacks alone needs around 2.2 GB at idle |
| Storage | 5 GB free disk space | Covers BlueStacks install and Cricfy TV APK |
| Graphics | Updated GPU drivers | Outdated drivers cause black screens on streams |
| Internet | 3 Mbps stable | Enough for smooth 480p–720p cricket streams |
| Virtualization | VT-x or AMD-V enabled in BIOS | Without it, BlueStacks falls back to slow software mode |
Recommended Requirements (Full HD 1080p Streaming)
| Component | Recommended Spec |
|---|---|
| Operating System | Windows 10 build 19041+ or Windows 11 |
| Processor | Intel Core i3 8th-gen / Ryzen 3 3200 or better |
| RAM | 8 GB or more |
| Storage | 10 GB free SSD space |
| Graphics | DirectX 11 GPU (Intel UHD 620 handles 1080p fine) |
| Internet | 10 Mbps or higher (25 Mbps for peak PSL / IPL nights) |
| Virtualization | VT-x / AMD-V enabled — mandatory for smooth HD |
Press Ctrl + Shift + Esc to open Task Manager, go to the Performance tab, and look at the bottom-right corner. If it says Virtualization: Disabled, follow the BIOS steps in Section 3 before installing BlueStacks. Skipping this step is the number one reason people report laggy or choppy Cricfy TV streams on PC.
You will also need two files on your PC before the actual install:
- The latest BlueStacks installer from bluestacks.com/download.html — it is free and around 750 MB.
- The latest Cricfy TV APK from cricfyapp.pk — the current build is v6.8 and weighs around 30 MB.
Step 0 — Enable Virtualization in BIOS (Do This First)
Think of hardware virtualization — called Intel VT-x on Intel processors and AMD-V (SVM Mode) on AMD processors — as a turbocharger for BlueStacks. With it on, the emulator offloads heavy Android processing directly to your CPU. With it off, BlueStacks runs everything in software, which is sluggish and causes stream buffering even on fast internet.
How to Check If Virtualization Is Already On
- Open Task Manager Press Ctrl + Shift + Esc on your keyboard. Task Manager opens.
- Go to the Performance tab Click “Performance” at the top. Then click “CPU” in the left column.
- Check the Virtualization status Look at the bottom-right block of CPU stats. If it shows Virtualization: Enabled, you are good — skip to Section 4. If it says Disabled, carry on below.
How to Enable VT-x / AMD-V in BIOS (Windows 10 / 11)
- Open Windows Settings Click Start, then go to Settings → Update & Security (Windows 10) or System → Recovery (Windows 11).
- Enter Advanced Startup Under “Recovery,” click Restart Now. Your PC reboots into a blue options screen.
- Navigate to UEFI Firmware Settings Click Troubleshoot → Advanced Options → UEFI Firmware Settings → Restart. Your PC reboots directly into BIOS.
-
Find the Virtualization setting
The exact path varies by motherboard brand, but the common locations are:
- ASUS: Press F7 for Advanced Mode → Advanced → CPU Configuration → Intel Virtualization Technology
- Dell: Advanced tab → Virtualization
- HP: Advanced tab → Virtualization Technology
- Lenovo: Security tab → Virtualization → Intel VT-d Feature
- AMD CPU (any brand): Look for SVM Mode under CPU or OC settings
- Set it to Enabled Highlight the setting, press Enter, and choose Enabled.
- Save and exit Press F10 to save your changes and restart. Windows boots normally. Your CPU is now in full hardware-accelerated mode.
Most PCs use F2, F10, F12, or Delete to enter BIOS during startup. If your PC boots too fast to catch it, disable Fast Startup in Windows (Control Panel → Power Options → Choose what the power button does → Turn off fast startup) and try again. BlueStacks’ official support page at support.bluestacks.com also lists manufacturer-specific BIOS shortcuts.
Step 1 — Download and Install BlueStacks
BlueStacks is the world’s most popular Android emulator for PC. It creates a full Android 11 environment inside Windows, which means every Android app — including Cricfy live TV — runs exactly as it would on a phone, just on your monitor.
- Download the installer Open your browser and go to bluestacks.com/download.html. Always download from the official BlueStacks website — never from a third-party mirror, because those often bundle adware. The installer file is around 750 MB. On an 8 Mbps line, expect a 7–10 minute download.
- Run as Administrator Once the download finishes, right-click the installer file and choose Run as administrator. BlueStacks needs elevated permissions to create the Android virtual machine on your system.
- Follow the installation wizard The wizard asks where to install BlueStacks. The default drive is fine. Click Install now. The process takes roughly three to five minutes depending on your drive speed. An SSD finishes in about 90 seconds.
- Wait for first-time setup After the install, BlueStacks launches automatically and runs its first-time environment setup. It pulls the Play Store framework and configures Android services in the background. This takes about one to two minutes on the first run only.
- Skip the Google sign-in (optional) BlueStacks asks you to sign in to your Google account. This is optional for Cricfy TV — you will not use the Play Store to install it. Click Skip or Continue. Either way works.
BlueStacks is now installed and running. You will see the Android home screen inside the BlueStacks window. Move on to the next step.
BlueStacks 5 runs Android 11 and gives you better raw streaming performance. BlueStacks 10 (the newer “cloud-hybrid” version) works on lower-spec machines because some processing offloads to the cloud. For most users watching Cricfy TV, BlueStacks 5 is the better pick. If your PC has less than 4 GB RAM, try BlueStacks 10 instead.
Step 2 — Download and Install Cricfy TV APK on BlueStacks
Cricfy TV does not have a native Windows installer. It is an Android APK — an Android Package Kit file. But BlueStacks installs APK files just as easily as any Play Store app. Here is how.
Download the Cricfy TV APK
Open your browser (outside BlueStacks, in normal Windows) and visit cricfyapp.pk. Click the main download button. The file is Cricfy TV v6.8, around 30 MB. Save it to a location you can find easily — the Downloads folder or your Desktop both work fine.
Only download the Cricfy TV APK from cricfyapp.pk. Telegram groups, Facebook posts, and random file-sharing sites sometimes distribute modified APKs. The official source is the safest and always carries the latest version with current server lists.
Install the APK Inside BlueStacks — Two Methods
You have two equally simple ways to get the APK into BlueStacks:
- Method A — Drag and Drop (Easiest) Open BlueStacks so its window is visible on your screen. Then open File Explorer in Windows and navigate to where you saved the Cricfy TV APK. Drag the APK file from File Explorer and drop it directly onto the BlueStacks window. Installation starts automatically and completes in about five to ten seconds. A confirmation pop-up appears when done.
- Method B — Install APK Button Inside BlueStacks, look at the sidebar on the right side of the window. Click the Install APK icon (it looks like a small Android robot or a package icon). A standard Windows file browser opens. Navigate to your downloaded Cricfy TV APK file and click Open. BlueStacks installs it the same way.
Launch Cricfy TV on Your PC
- Open the BlueStacks home screen After installation, BlueStacks may automatically open the app. If not, go to the home screen of BlueStacks (click the house icon). You will see the Cricfy TV icon in the app drawer.
- Grant permissions on first launch Cricfy TV asks for storage access and (optionally) notification permission on first launch. Grant both. Storage access is needed to cache stream data temporarily.
- Pick a category and start streaming The app opens directly to its channel grid. Tap Sports or Cricket, choose a match, and select a server. Your live cricket stream starts within a few seconds. Use the BlueStacks fullscreen button (or F11) to fill your monitor.
That is the complete install. You are now watching Cricfy live cricket on your PC in full HD — free, no account, no subscription.
Step 3 — Optimize BlueStacks for Smooth HD Streaming
Default BlueStacks settings are balanced for gaming, not video streaming. A few tweaks make a noticeable difference on Cricfy TV — especially during high-load matches like PSL finals or India vs Pakistan fixtures.
Allocate More CPU Cores and RAM
Inside BlueStacks, click the gear icon (Settings) → Performance. Set CPU cores to 4 (or half of your total cores) and RAM to 4096 MB if your PC has 8 GB or more. This lets BlueStacks handle 1080p streams without the main Windows system feeling sluggish.
Set Graphics Engine to Performance
Go to Settings → Graphics. Change the Graphics Engine Mode from Compatibility to Performance. Also, set the Display Resolution inside BlueStacks to match your monitor — 1920×1080 for most setups. This step eliminates blurry text and upscaling artifacts in the Cricfy TV interface.
Enable HEVC Hardware Decoding
In Settings → Graphics, enable Hardware-accelerated graphics. This allows BlueStacks to use your GPU for video decode instead of the CPU — reducing CPU load by up to 40% during HD streams. If you have an NVIDIA or AMD GPU, this makes the biggest single difference.
Use Fullscreen Mode
Press F11 inside BlueStacks or click the expand icon on the title bar. Fullscreen hides Windows taskbars and gives Cricfy TV the entire display — cleaner viewing and fewer dropped frames because Windows redraws less UI overhead.
Internet Tips for Buffer-Free Streaming
- Connect via Ethernet cable instead of Wi-Fi if you have the option. Wired connections cut latency by half compared to most home Wi-Fi setups.
- Close Chrome, YouTube, or any other browser tabs before launching the stream. A single Chrome tab with an open YouTube page can consume 1–2 Mbps silently.
- Set Cricfy TV quality to 720p on connections under 10 Mbps. The visible difference between 720p and 1080p on a 24-inch monitor is minimal, but the buffering difference on a 7 Mbps line is enormous.
- If one server in Cricfy TV stutters, switch to the next server link. Most matches carry three to five server options. Server two or three is often less loaded during peak-traffic moments like the start of an innings.
What Channels Can You Watch on Cricfy TV for PC?
The full Cricfy TV channel list carries over completely to the PC version inside BlueStacks. No channels are cut, no features are locked. Here is a summary of the categories that matter most to cricket and sports fans.
| Category | Key Channels | Coverage |
|---|---|---|
| Cricket (Pakistan) | PTV Sports, Geo Super, A Sports | PSL, Pakistan home series, bilateral tours |
| Cricket (India) | Star Sports 1/2/3, Sony Ten 1/2/3, Willow TV | IPL, India bilateral series, BCCI events |
| Cricket (International) | Sky Sports Cricket, Fox Cricket, BT Sport, ESPN | Ashes, BBL, ICC events, CPL, BPL |
| Football | beIN Sports, TNT Sports, Sky Sports, DAZN, CBS Sports | UEFA Champions League, EPL, La Liga, Serie A, Bundesliga |
| Multi-sport | ESPN, Eurosport, SuperSport | Tennis Grand Slams, Formula 1, boxing, kabaddi, hockey |
| News (Pakistan) | Geo News, ARY News, Bol News, Samaa, Dunya News | 24/7 news in Urdu and English |
| Entertainment | Hum TV, ARY Digital, Geo Entertainment, Star Plus, Colors, Zee TV | Dramas, shows, movies, music |
| Kids & Docs | Cartoon Network, Discovery, National Geographic, History | Family-friendly content alongside sports |
In total, over 600 live channels stream through Cricfy TV. That covers every ICC event on the ICC official calendar, every PSL season, IPL, Pakistan Super League fixtures, and major football competitions like the UEFA Champions League.
Common Cricfy TV PC Errors — and How to Fix Them Fast
Even a clean install can hit snags. Here are the six most common problems people run into when using Cricfy TV on PC through BlueStacks — with exact fix steps.
Problem 1 — BlueStacks Won’t Install or Crashes on Start
This is almost always a virtualization issue. Open Task Manager → Performance → CPU and confirm virtualization shows “Enabled.” If it still says “Disabled” after you followed Section 3, update your BIOS firmware. Some older BIOS versions hide the VT-x toggle until updated. Check your motherboard manufacturer’s website for the latest BIOS version.
Also check: Windows Hypervisor Platform and Hyper-V must be disabled if they conflict with BlueStacks 5. Go to Windows Features (search “Turn Windows features on or off”) and uncheck Hyper-V. BlueStacks 5.20+ supports running alongside Hyper-V, but older builds do not.
Problem 2 — Cricfy TV App Shows a Black Screen
Update your GPU drivers. Outdated Intel, NVIDIA, or AMD drivers are the single biggest cause of black screens during HEVC-encoded streams. Visit Intel’s driver download page, NVIDIA GeForce Experience, or AMD Adrenalin and install the latest drivers. Restart your PC, relaunch BlueStacks, and try again. Also switch the BlueStacks Graphics Engine to “Performance” (not “Compatibility”) in Settings → Graphics.
Problem 3 — Streams Keep Buffering
First, switch to a different server inside Cricfy TV — tap the server selector (usually shown as “Server 1,” “Server 2,” etc.) below the video player. If buffering continues, drop the quality to 720p or 480p. Also, close all background browser tabs and check your actual download speed at fast.com. You need at least 5 Mbps for stable HD on the emulator. Finally, try switching from Wi-Fi to an Ethernet cable if possible.
Problem 4 — “App Not Installed” Error When Sideloading APK
This means an older version of Cricfy TV is already installed inside the BlueStacks instance. Uninstall the old version first: long-press the Cricfy TV icon in BlueStacks app drawer → Uninstall. Then drag the new APK in. If the error persists, go to BlueStacks Settings → App Manager → find Cricfy TV → Uninstall from there, then reinstall.
Problem 5 — No Sound During Streams
Click the audio icon on the BlueStacks sidebar and make sure it is not muted. Also open Windows Volume Mixer (right-click the speaker icon in the taskbar → Open Volume Mixer) and confirm BlueStacks is not set to zero or muted there. As a final step, go to BlueStacks Settings → Audio and make sure the correct audio output device is selected.
Problem 6 — Cricfy TV “Unexpected Error Occurred” Inside BlueStacks
This is the same error that hits on mobile, just now appearing inside the emulator. Three fast fixes work ninety percent of the time: (1) disable any VPN running on Windows before launching BlueStacks, (2) check that your Windows system date and time are set to Automatic, and (3) download and install the latest Cricfy TV APK from cricfyapp.pk. Our dedicated Cricfy TV unexpected error guide covers eight more edge-case fixes.
Alternative Emulators If BlueStacks Does Not Work for You
BlueStacks is the top pick — but it is not the only one. If your PC cannot run it smoothly, these alternatives handle Cricfy live TV equally well.
| Emulator | Idle RAM | Best For | Free? |
|---|---|---|---|
| BlueStacks 5 / 10 | ~2.2 GB | Overall best, HD streaming, Chromecast | Yes |
| LDPlayer 9 | ~1.4 GB | Older laptops, 4–8 GB RAM machines | Yes |
| NoxPlayer 7 | ~1.8 GB | Multi-instance — watch two matches at once | Yes |
| MEmu Play 9 | ~1.6 GB | Very low-end PCs (pre-2016 hardware) | Yes |
The install process for all four is identical to BlueStacks: download the emulator, install it, drag the Cricfy TV APK into the window, and start streaming. The only differences are in resource usage and feature polish.
If you are on a very low-spec laptop with 4 GB RAM, LDPlayer 9 is the best swap — it uses 35% less idle RAM than BlueStacks, which leaves more headroom for the stream itself.
Frequently Asked Questions — Cricfy TV for PC (BlueStacks)
Is there a native Cricfy TV app for Windows or Mac?
No. The Cricfy TV developers have not released a native Windows or macOS installer. The app is Android-only. However, Android emulators like BlueStacks, LDPlayer, NoxPlayer, and MEmu let you run it on any modern PC with zero limitations — every channel, every feature, full HD.
Do I need a Google account to use Cricfy TV on BlueStacks?
No. Cricfy TV requires no account — not on Android, not on BlueStacks. You can also skip the Google sign-in inside BlueStacks entirely since you will install the APK manually rather than from the Play Store.
Is BlueStacks safe to install on my PC?
Yes. BlueStacks is a legitimate, widely-used Android emulator with over 500 million downloads. It does not carry malware or spyware. It also runs inside a sandboxed environment, which means Cricfy TV inside BlueStacks is isolated from your main Windows system. As always, download only from the official site: bluestacks.com.
How much internet speed do I need for Cricfy TV on PC?
You need at least 3 Mbps for SD (480p), 5 Mbps for HD (720p), and 10 Mbps or more for Full HD (1080p). During high-demand fixtures like India vs Pakistan or PSL finals, server load spikes — having 25 Mbps available means you can switch to an alternative server and stay in HD without dropping quality.
Can I watch Cricfy TV on a laptop with 4 GB RAM?
Yes, but it is tight. BlueStacks 5 uses about 2.2 GB at idle, leaving roughly 1.6–1.8 GB for Windows and the stream itself. You will likely need to close all other apps, use 720p quality, and avoid multitasking. A better option for 4 GB machines is LDPlayer 9, which idles at around 1.4 GB — noticeably lighter. BlueStacks 10 (the hybrid version) also works well on lower-spec machines.
Can I use a VPN with Cricfy TV on BlueStacks?
You can, but set the VPN on Windows rather than inside BlueStacks. A system-level VPN (like ProtonVPN or NordVPN running in the Windows tray) tunnels BlueStacks traffic automatically. Avoid running a VPN app inside the emulator — it usually causes the “Unexpected Error Occurred” message on Cricfy TV. Also note: some Cricfy TV servers block common VPN IP ranges, so if streams stop working, try turning the VPN off first.
Can I record a live cricket match using Cricfy TV on PC?
Cricfy TV has no built-in recorder. However, both BlueStacks and LDPlayer include a native screen recorder. Inside BlueStacks, find the camera icon on the sidebar — it records the emulator screen to MP4. Note that recording copyrighted broadcasts (like Star Sports or PTV Sports streams) and sharing them publicly breaches copyright law in most countries.
Can I cast Cricfy TV from BlueStacks to my LED TV?
Yes, two ways work well. First, connect your PC to the TV via an HDMI cable — the simplest option and zero lag. Second, if your TV supports Chromecast, BlueStacks 5 lets you cast the stream from its share/cast menu directly to the TV over your home Wi-Fi. The HDMI route is more reliable during high-traffic match nights.
Cricfy TV opens but shows no channels — what happened?
This usually means you are running an outdated APK version. Old versions carry outdated server lists that no longer resolve. Download the current Cricfy TV v6.8 APK from cricfyapp.pk, uninstall the old version from BlueStacks, and reinstall the fresh file. Channels should appear immediately on the next launch.
Does Cricfy TV on PC work for PSL, IPL, and ICC events?
Yes. The app carries PTV Sports and Geo Super for PSL, Star Sports and Sony Sports networks for IPL, and a full range of international broadcasters for ICC events like the T20 World Cup, ODI World Cup, and Champions Trophy. The PC experience through BlueStacks delivers the full channel list — no tournament is blocked or cut on desktop.
The Bottom Line
Running Cricfy TV on PC via BlueStacks is one of the best free cricket-watching setups available in 2026. You get 600+ live channels — PTV Sports, Star Sports, Ten Sports, Sky Sports Cricket, beIN Sports, ESPN — on a proper monitor, in true HD, with zero subscription and zero login.
The whole setup takes under ten minutes: enable virtualization, install BlueStacks, drag the APK in, and you are watching live cricket from your couch with a proper screen. If BlueStacks feels heavy on your machine, LDPlayer 9 handles the same APK on lighter hardware.
Head to cricfyapp.pk to grab the latest Cricfy TV APK, then follow the steps above. Bookmark this page — it covers every error you are likely to hit during setup or on a big match night.

11 Comments